Online Induction >> Online Induction Tutorials

Form Building Guide

When creating a form, it is important to remember there are actions that can affect its functionality. Please review below some helpful tips to avoid functionality issues when form building. 

Quick Tips

Avoid the use of extra spaces at the end of the text in a field. e.g. “Full Name  ”.

No fields can include duplicate text. e.g. If a field is titled “Phone Number”, no other fields can include the same text. A solution to combat this is varying phrases such as “Cell Phone Number” or “Mobile Number”.

Changes to field names must be completed by The Work Metrics Team. If you are editing a form already in use it is important you contact Work Metrics to complete the changes to avoid loss of data. 


Form Fields

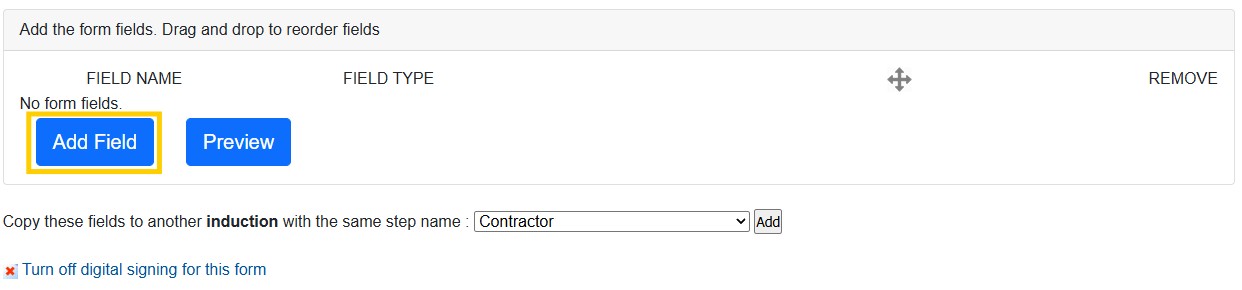
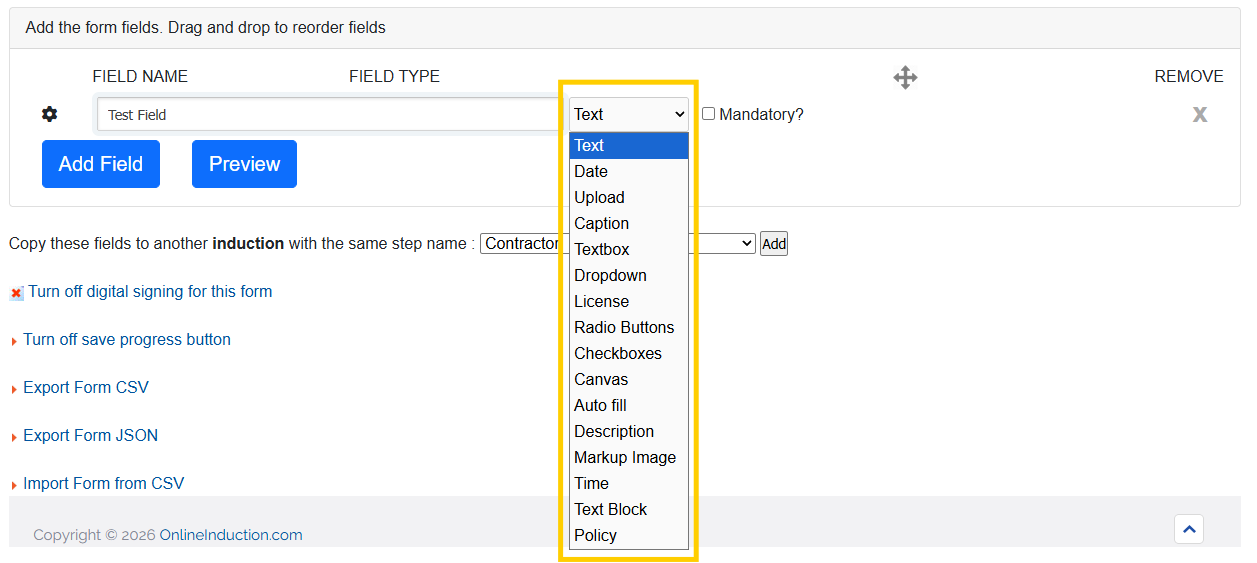
To add a new field to your form select ‘add field’, enter the field text and select the field type. 


Field Types


  • Text: Provides a fixed-size space where users can provide up to 1000 characters of text. Best for short sentences.

  • Date: Generates a calendar, from which users can select a date, month and year.

  • Upload: Allows for the upload of files, including PDF, JPEG and PNG file types.

  • Caption: Used for creating headings within your form, providing greater clarity of form sections to users.

  • Textbox: Provides a space for users to provide up to 1000 characters of text. Can be resized by users for improved readability. Best for paragraphs of text.

  • Dropdown: Creates a box containing a variety of selected options, as determined during the creation of the field by an Administrator. Users are able to select one multiple choice option.

  • License: Combines Date and Upload functionality. Users provide a copy of their documentation and its expiry date. Email reminders are sent to users in relation to approaching expiry dates.

  • Radio Buttons: Similar to Dropdown boxes, radio buttons provide clickable multiple choice options from which one can be selected. Unlike Dropdown boxes, all options are visible immediately.

  • Checkboxes: Provides a configurable list of options to users, from which multiple can be selected.
    Canvas: A small canvas tile for users to digitally sign.

  • Auto fill: A field can be set as an autofill field which will then link to a primary dropdown field and autofill the value of that field based on the selection in the primary field.

  • Description: Similar to a caption field, this field type is used to show some text in the form (for example, instructions for upcoming fields).

  • Markup Image: This field type allows admins to upload an image and users can then drop pins on the image when completing the form, which will be saved with the report.

  • Time: Limits user input to an HH:MM input.

  • Text Block: This is generally used to display a larger portion of text in which you wish to format more freely, e.g. coloured text, font, bold, highlight etc. 


Settings Cog

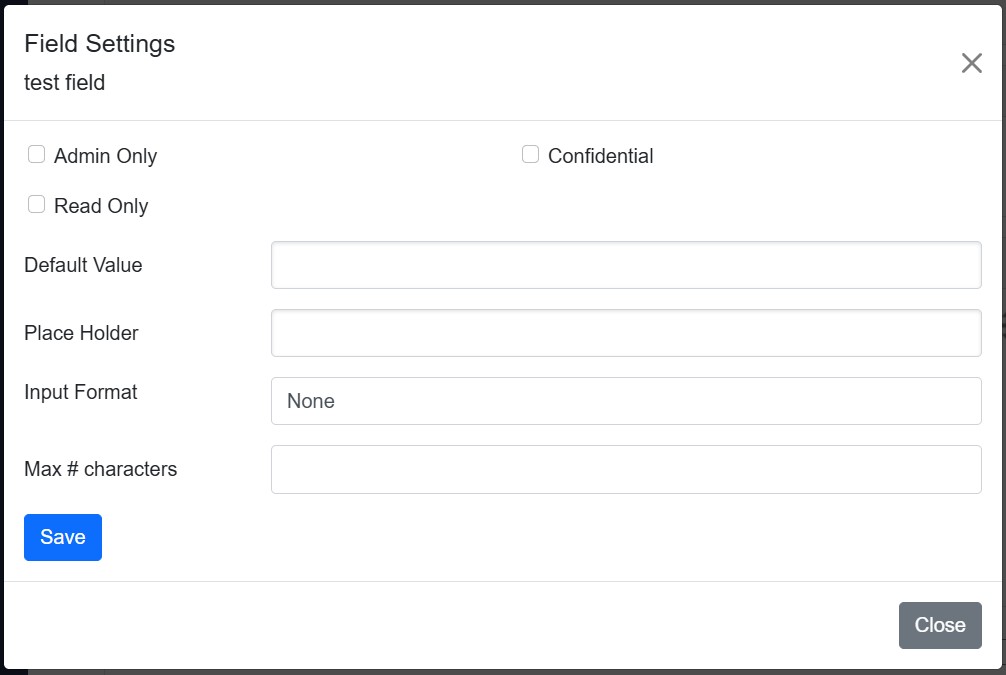
Depending on the field type selected you have different configuration options applicable to each field via the settings cog.

Admin Only: Will hide the field from users.
Read Only: The user wont be required to answer. 
Confidential: The field lets you restrict who see the answer an inductee submits. Guide Here   
Default value: Prefills the field with an editable value.
Place Holder: Place instructions in the text or text box field. 
Input Format: Set a format option - Dollar, Time, Uppercase, Lowercase, Formatted or Unformatted Number.
Max # Characters: Restrict the number of characters can be entered in the field. 
Only Future Dates: Can be applied to License fields, to accept only dates after the current date. 
Data Source: Can be applied to dropdown, checkboxes or radio button fields to pull information already captured in the portal. 


Rearranging Fields

To rearrange form fields simply drag the applicable field to the desired position.


Copy Function

If you need to copy the contents of a form into another form within the system you can select the applicable form and use the ‘copy’ function at the bottom of the form.


Intro Text

You can add intro text at the beginning of the form, often used for large descriptions or instructions, simply select ‘edit’.


Mandatory Fields

Marking a field as mandatory ensures the field must be completed before the form can be submitted by the user.


Digital Signing

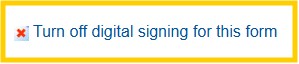
This feature captures the users signature at the end of a form before submission. Select ‘Turn on digital signing for this form’ to enable this.


Smart Fields

This feature allows you to link fields to populate based on selection from within another field. Note: Smartfields only work with ‘Dropdown’ and ‘Checkbox’ field types.

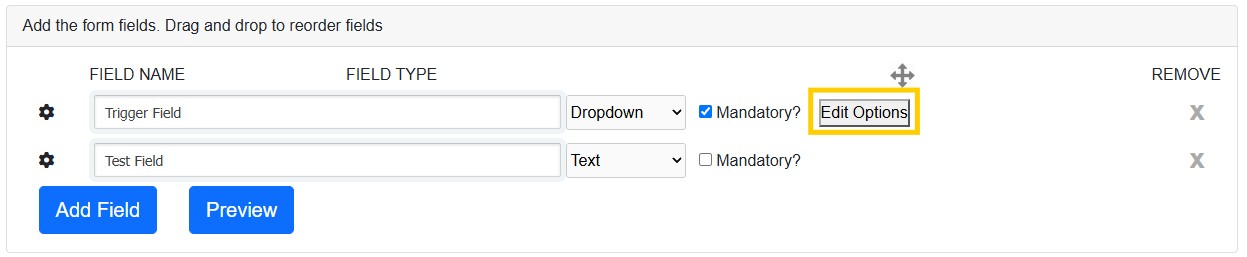
To begin, create all fields in the form. That means both the field that will trigger the second and the field(s) being triggered.

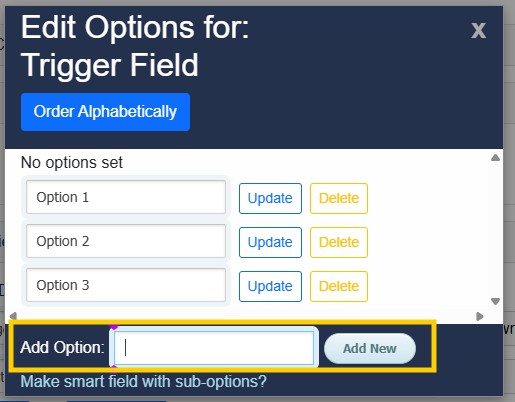
Click the ‘Edit Options’ button and set the required options for the dropdown boxes.
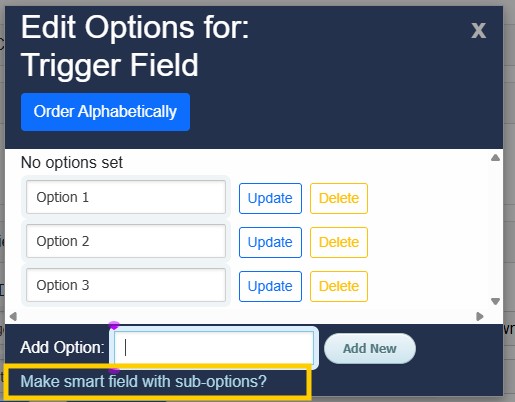
Click the ‘Edit Options’ button and then select ‘Make smart field with sub-options’. 


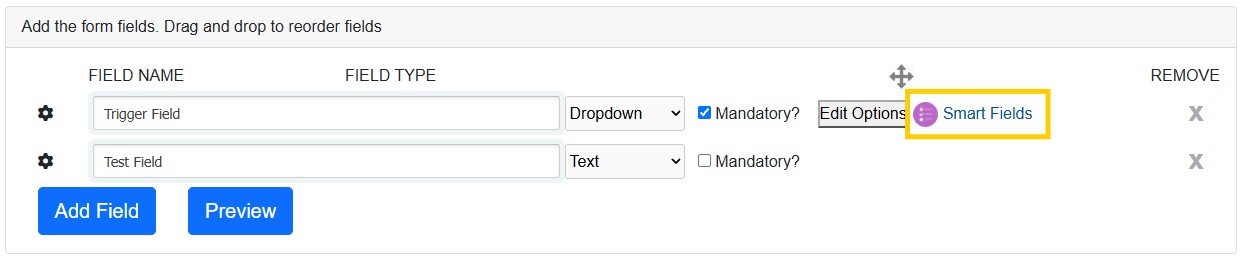
Select the new Smart Fields link that appears next to the ‘Edit Options’ button.

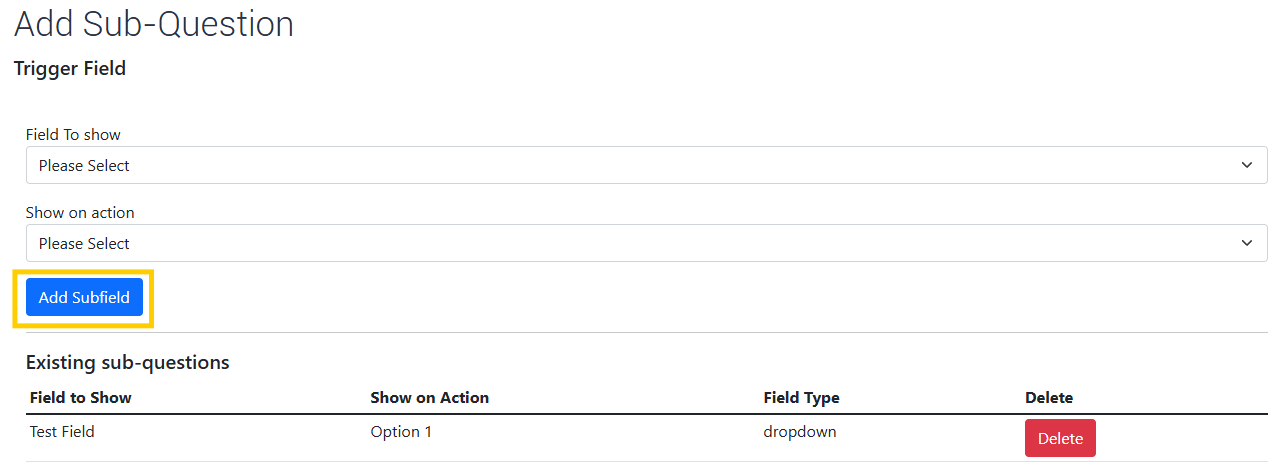
Select the name of the field to be triggered from the ‘Field to show’ and then the option it should be triggered upon from the ‘Show on action’ dropdown. Then select ‘Add Subfield’.


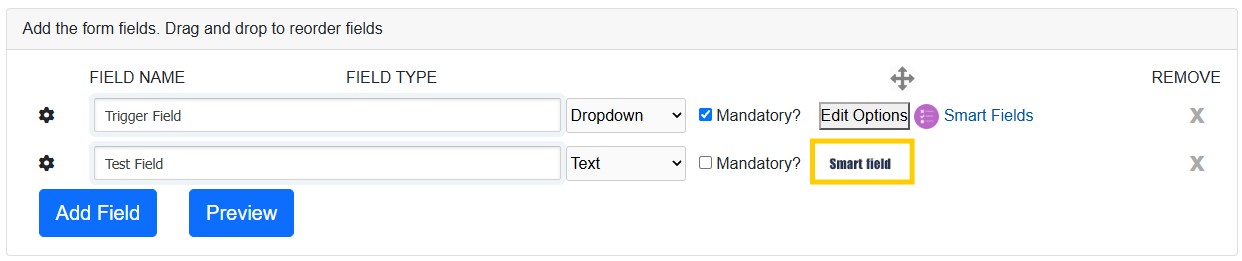
The triggered field will now have the ‘Smart field’ listed next to it.


  • Create the induction types first
  • Enter in the steps you want per induction type
  • Upload or create content per step
  • Create notifications
  • Link to your portal from your website
  • Tell your users to register


Meet the Support Team!

Courtney Walker
Head Of Customer Success

Michelle Nikolic
Client relationships and support (Maternity Leave)

Robbie Henderson
Client relationships and support

Aisha Annamalay
Client relationships and support

Mitch Downey
Client relationships and support

Onboarding Team

Patricia Cuozzo
Product and Onboarding Lead

Cindy Bohl
Setup Success Team

Kayce Castle
Setup Success Team

Alexis Mckellow-Reading
Setup Success Team


Prequal & Training Team

Laura Williams
Trainer / Prequal Team

Hayley Golembka
Trainer/ Prequal Team

Destiny Rondon
Contractor Prequal Team

Sarah Loose
Contractor Prequal Team

Cam (Float)
Contractor Prequal Team